
The Draft Dodger Mail Slots come with several features that can be adjusted: Privacy Brushes, Silicone Gasket, and Torsion Rods.
Video Tutorial
Here is a comprehensive video tutorial outlining the possible adjustments that can be made to your Draft Dodger Mail Slot.
Removable Privacy Brushes
All Draft Dodger mail slots come equipped with a set of removable privacy brushes. The Uni-T model has the brushes installed on the interior frame.
Setting the brushes correctly.
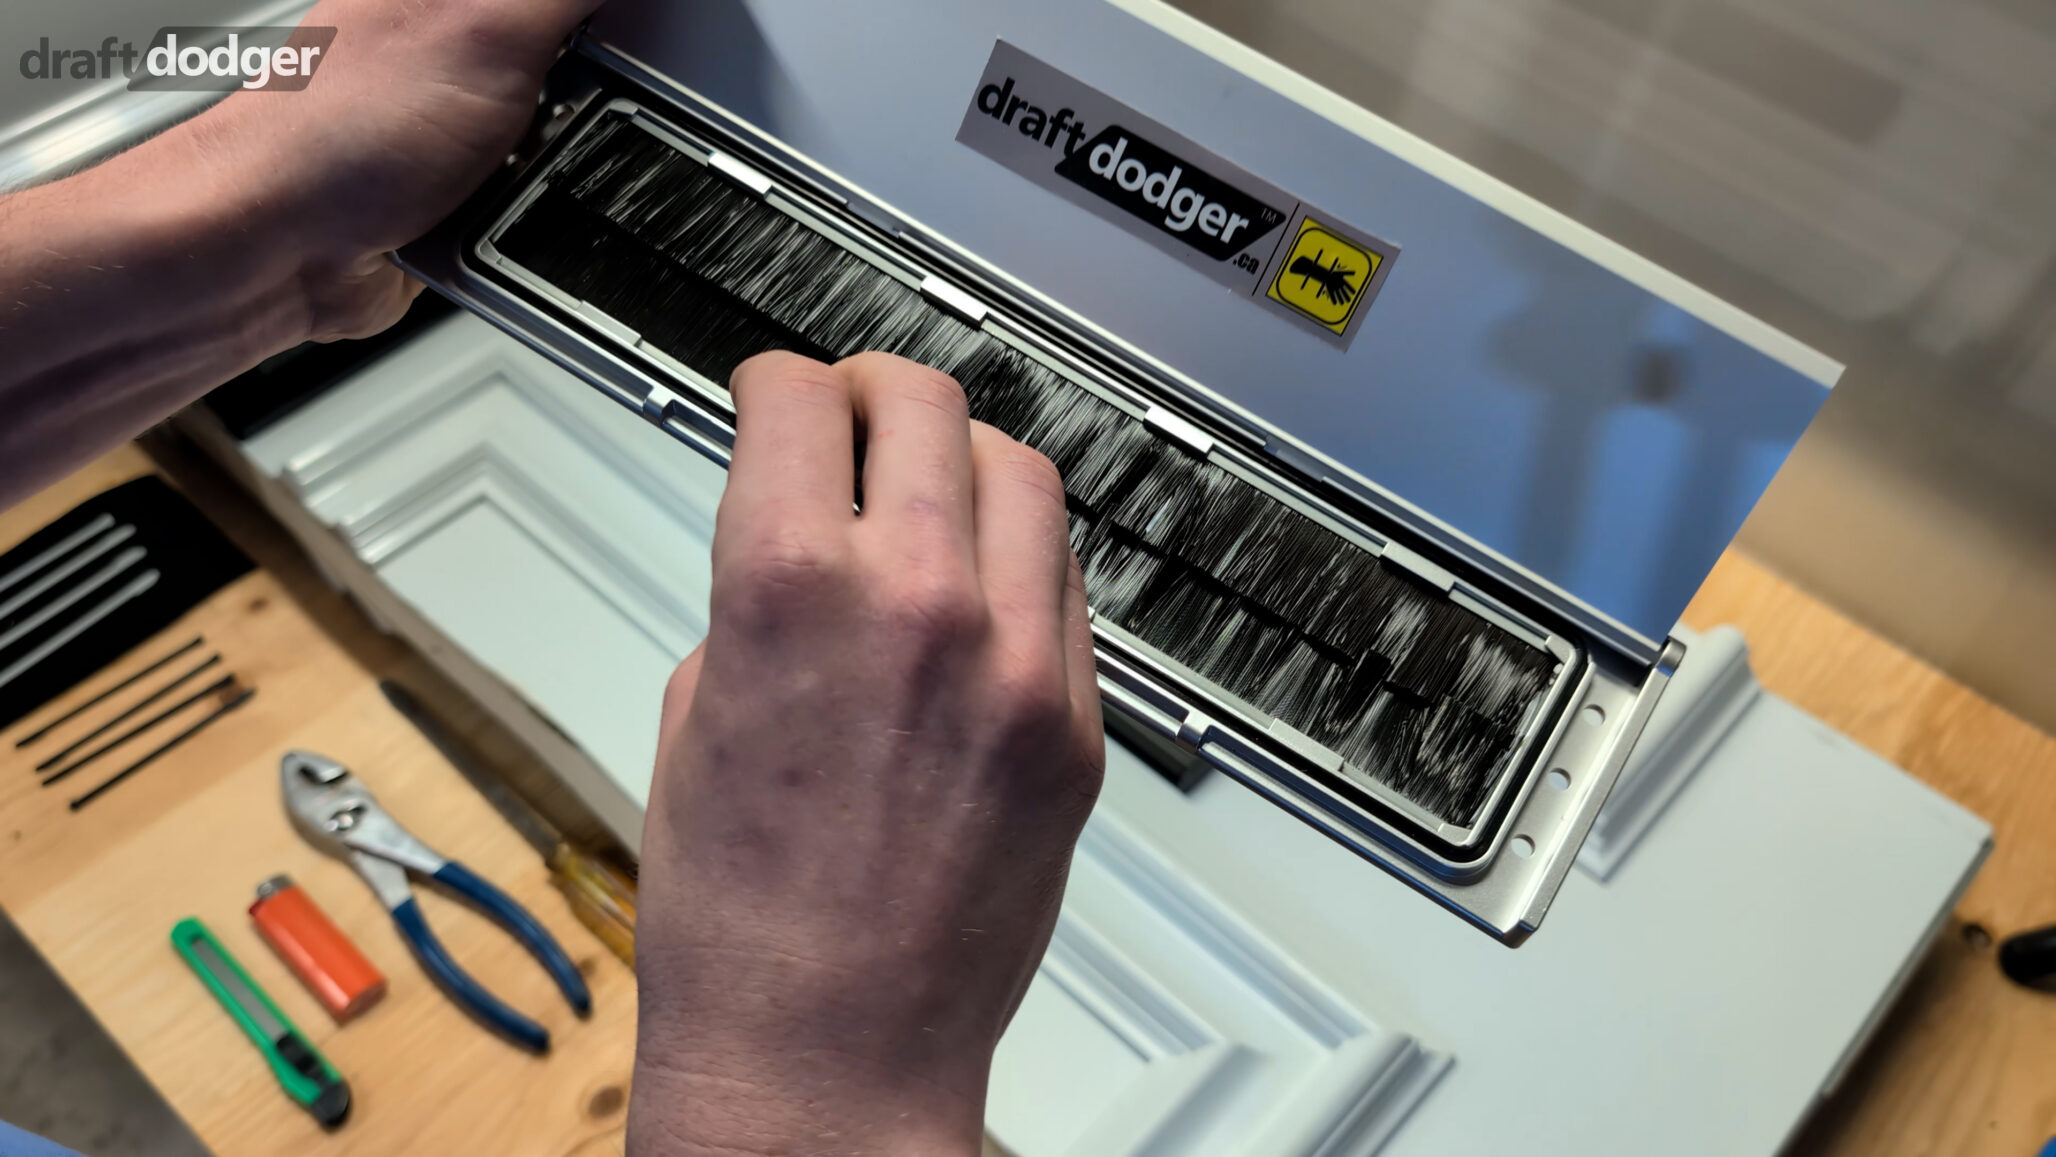
An important adjustment for your Draft Dodger mail slot is to have the privacy brushes set correctly so there is no issue with passing mail/parcels through.
This is a simple fix by setting the top row of brushes towards you and the bottom brushes away from you. Using your hand, run along the bottom row of brushes and push them inwards.
Removing/adding the brushes.
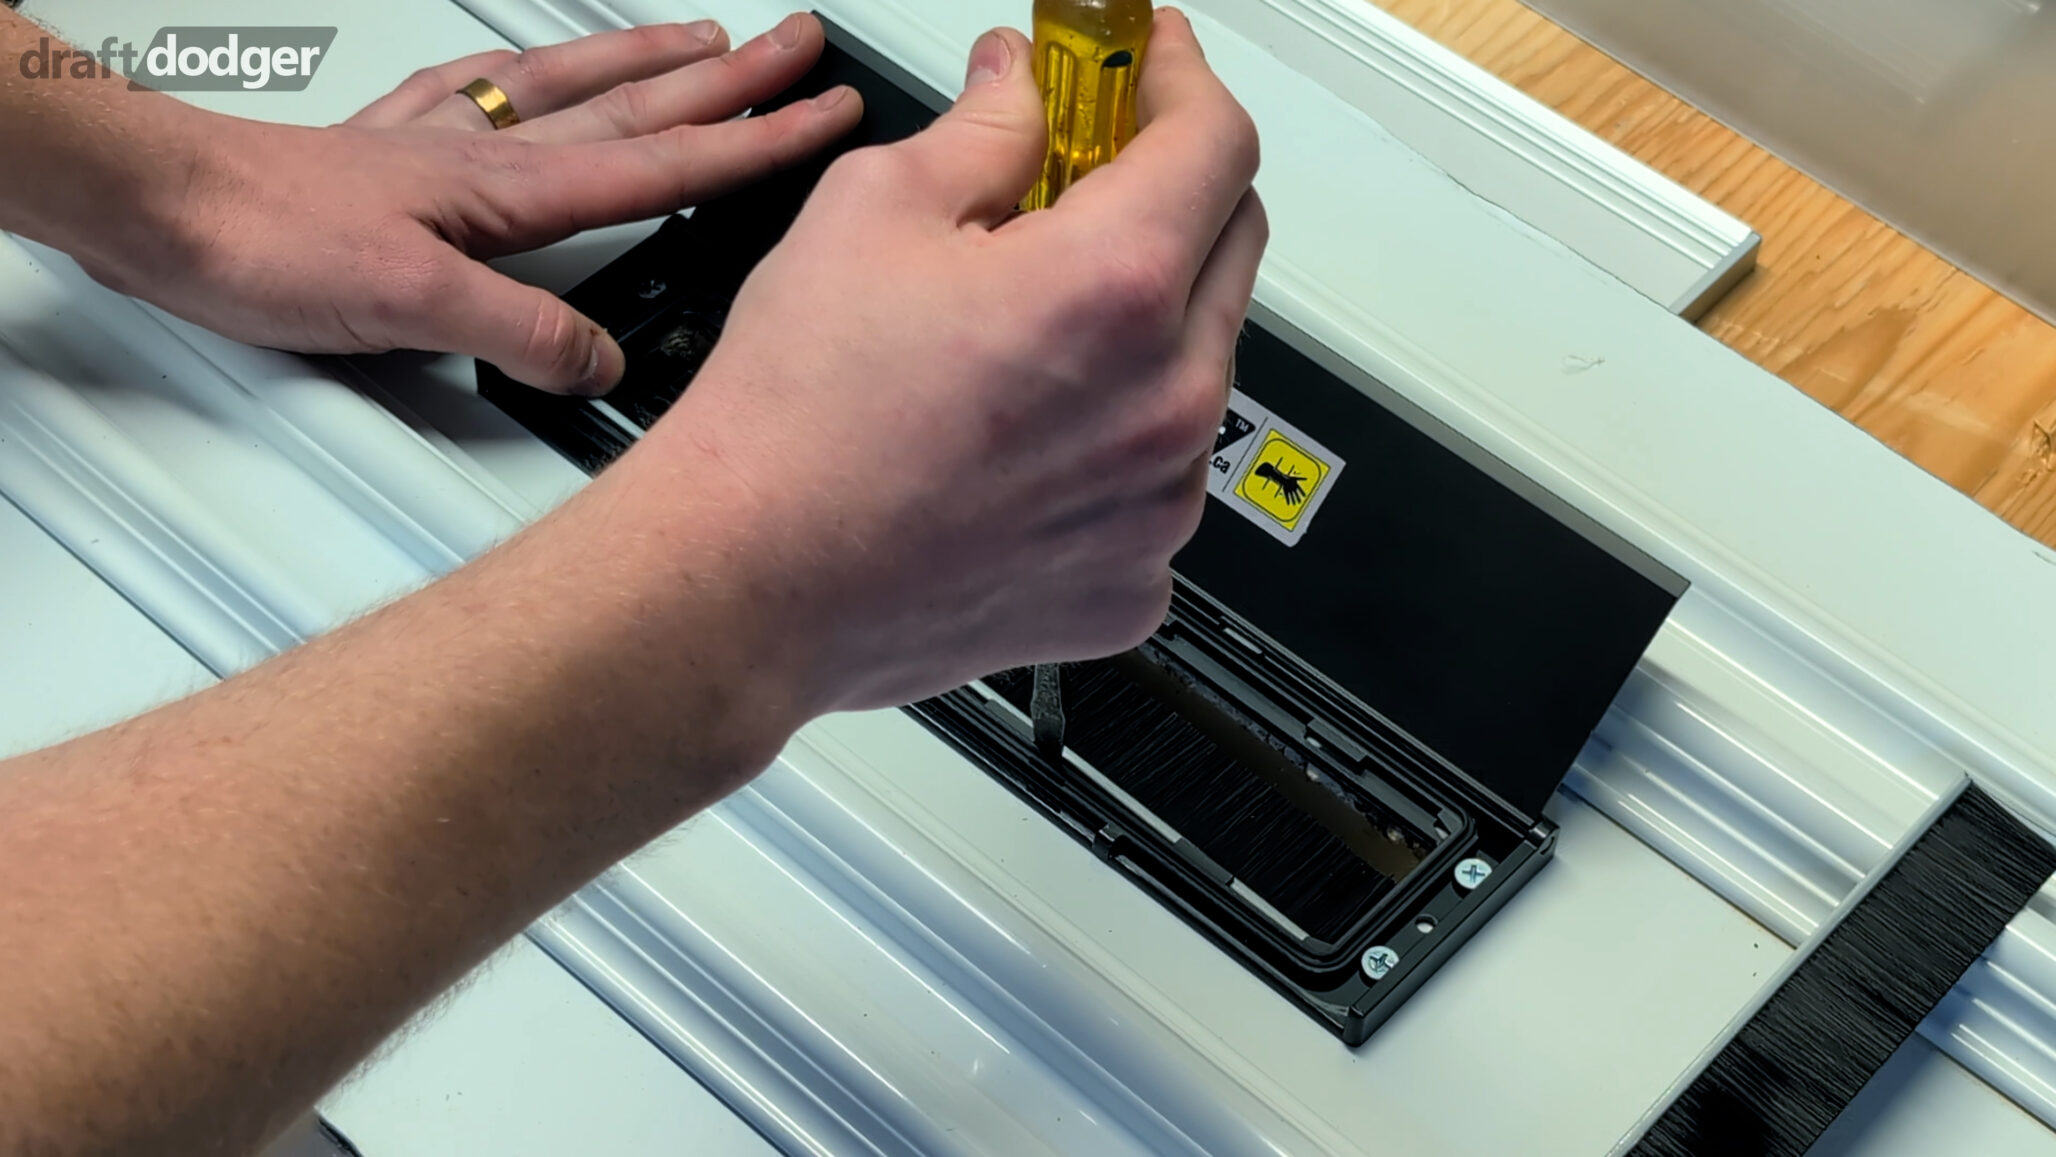
The brushes serve to both insulate and provide privacy to your home, making them an essential feature for your Draft Dodger mail slot to work effectively.
However, if you find that you prefer not to have them equipped, you may remove them easily using a flathead screwdriver.
You may always add them back by fitting the brushes back into their notches.
Silicone Gasket
All Draft Dodger mail slots come equipped with a silicone gasket.
Removing/adding the silicone gasket.
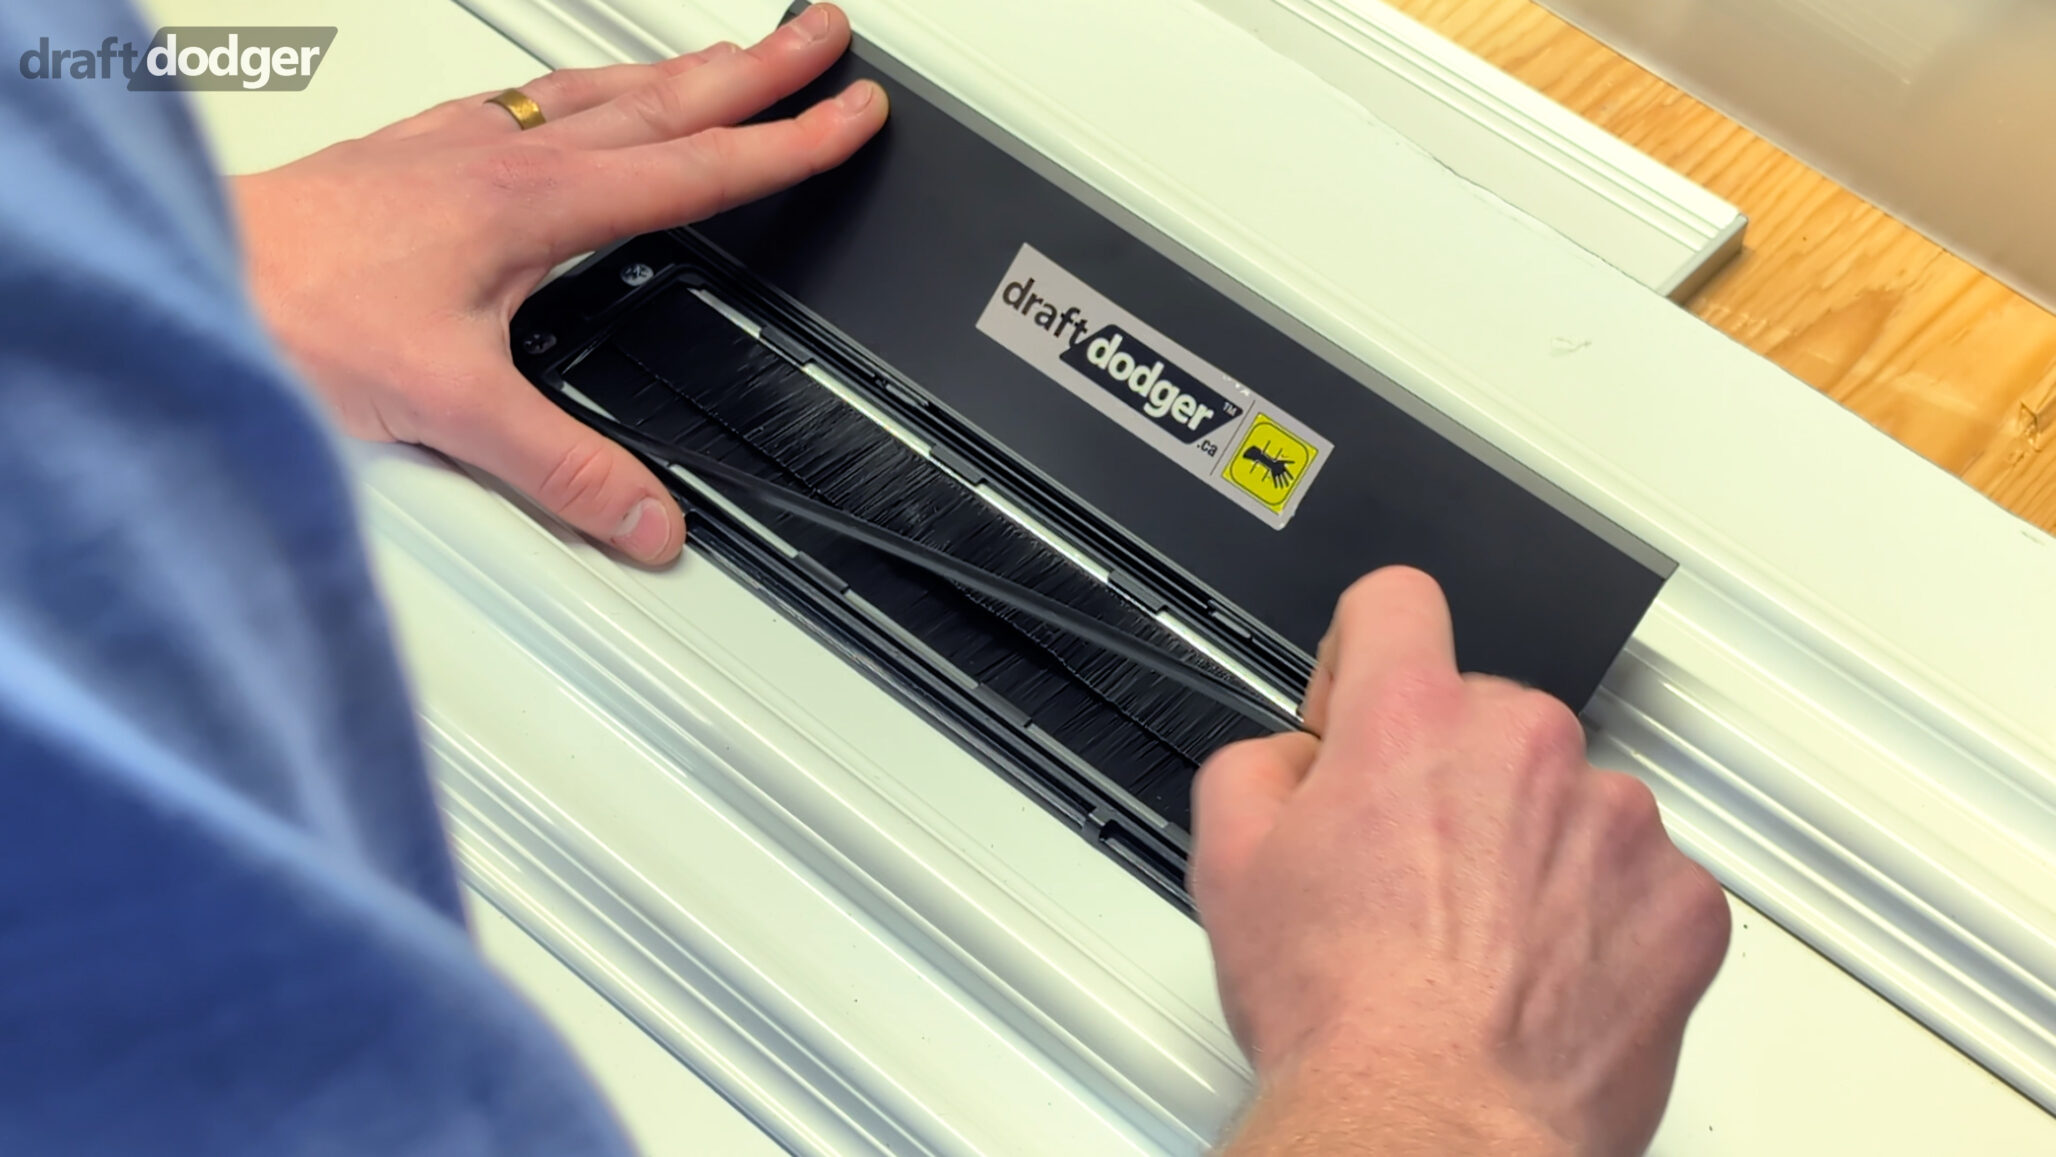
Again, the silicone gasket is one of the features of the Draft Dodger mail slot that protects your home from drafts.
If it becomes dislodged or you choose to remove it, you can simply pull it out of the notch that it sits in.
If you would like to re-install it, securely place it back in its notch.
Torsion Rods
All Draft Dodger mail slots use torsion rods to create tension on the aluminum flap to keep it closed.
After years of use, these torsion rods may break or wear, or you may not be satisfied with the strength of the tension on the flap. All issues can be resolved by replacing or adjusting your torsion rods.
There are a few things that should be known beforehand:
- The torsion rods are universal – they can be installed for any model.
- Torsion rods are tricky to remove once they have be placed in (more will be explained in the installation).
- You can calibrate the strength (closing force) of the mail flap with the torsion rods.
It reasonable to assume that you will be installing the torsion rods while the mail slot is installed on the door, but if you can remove the mail slot easily (if there was no caulking used to install it), then do so.
Removing the torsion rods
Tools needed:
- X-Acto knife
- Lighter
- Protective equipment: gloves and safety glasses
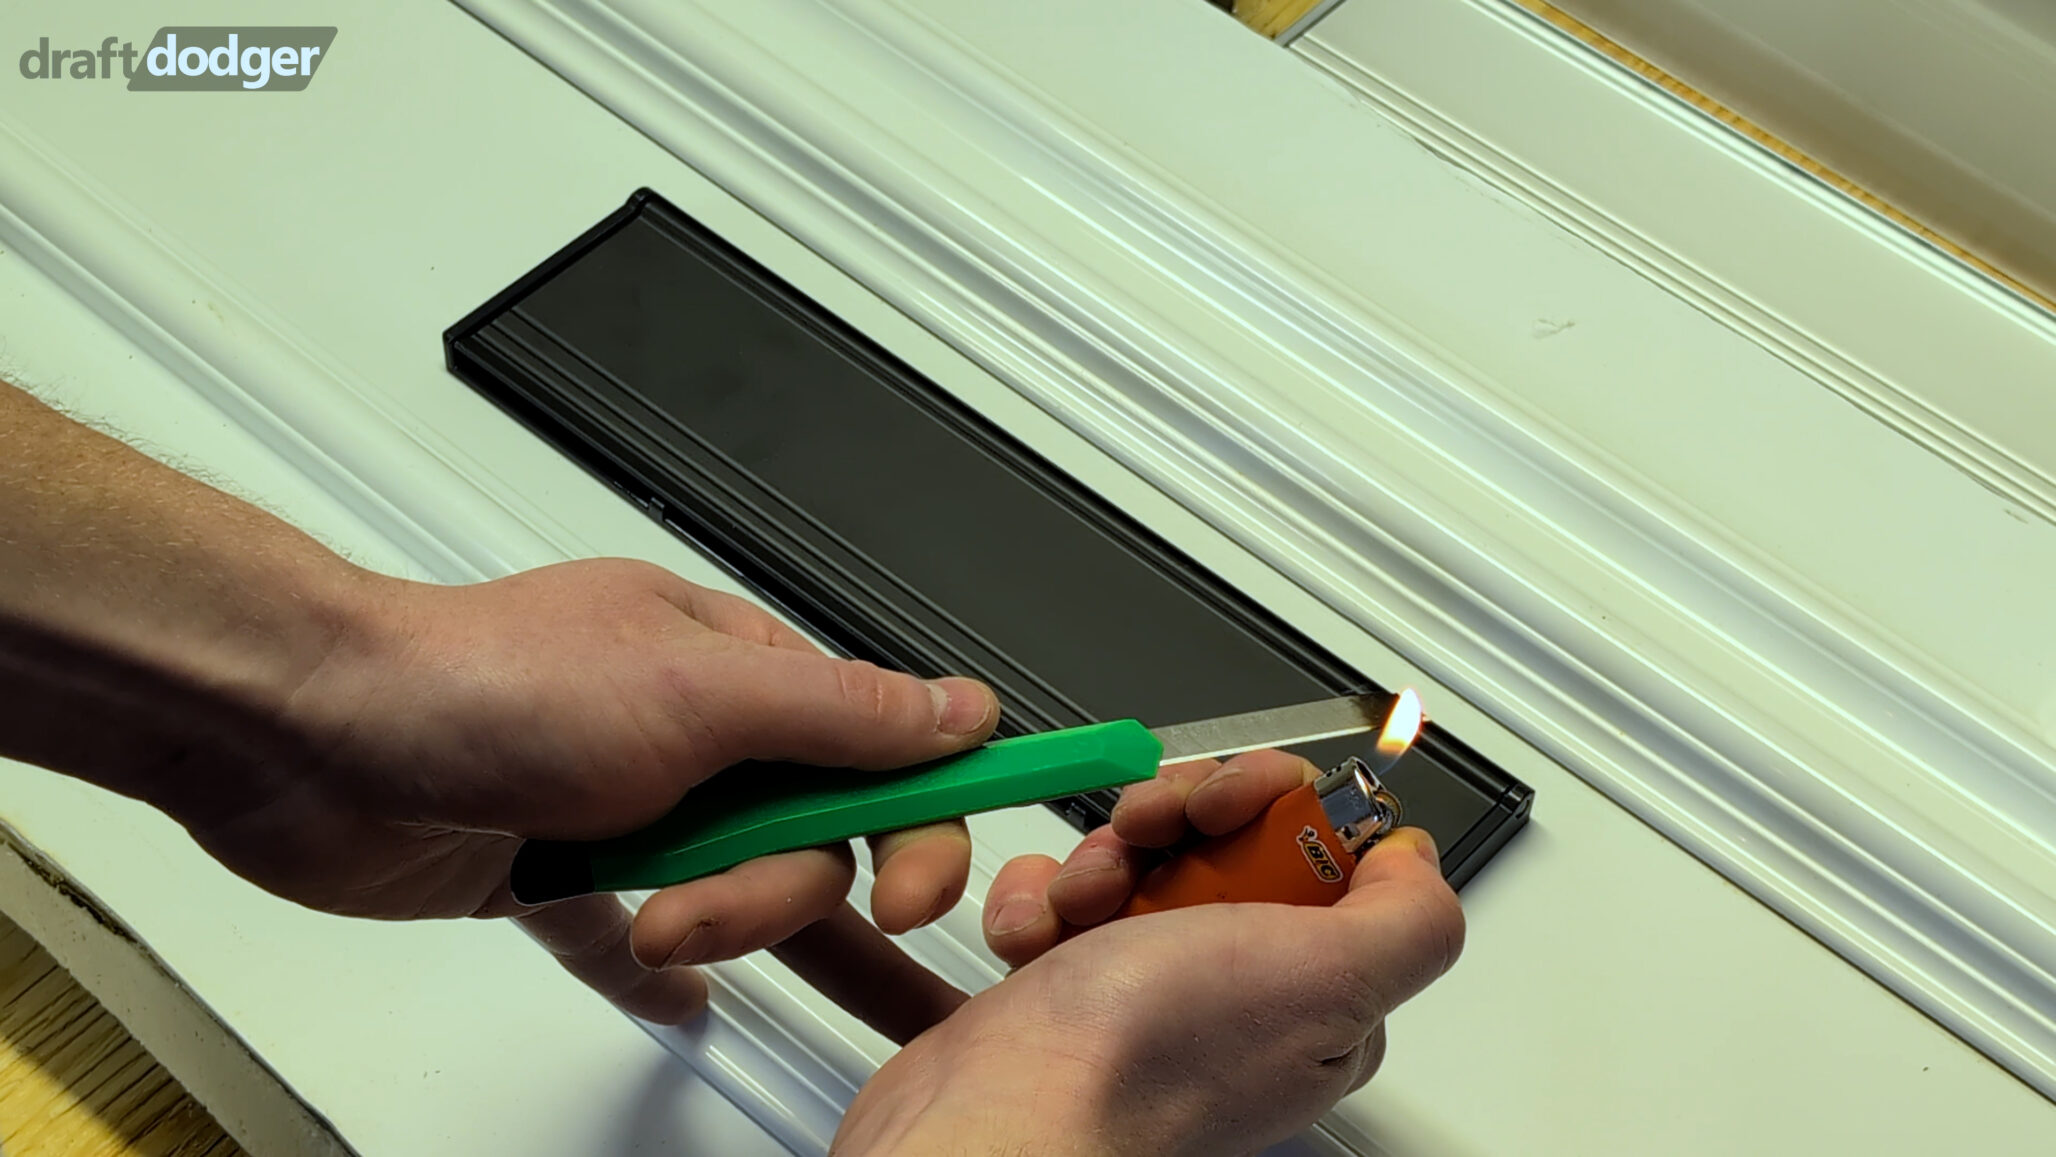
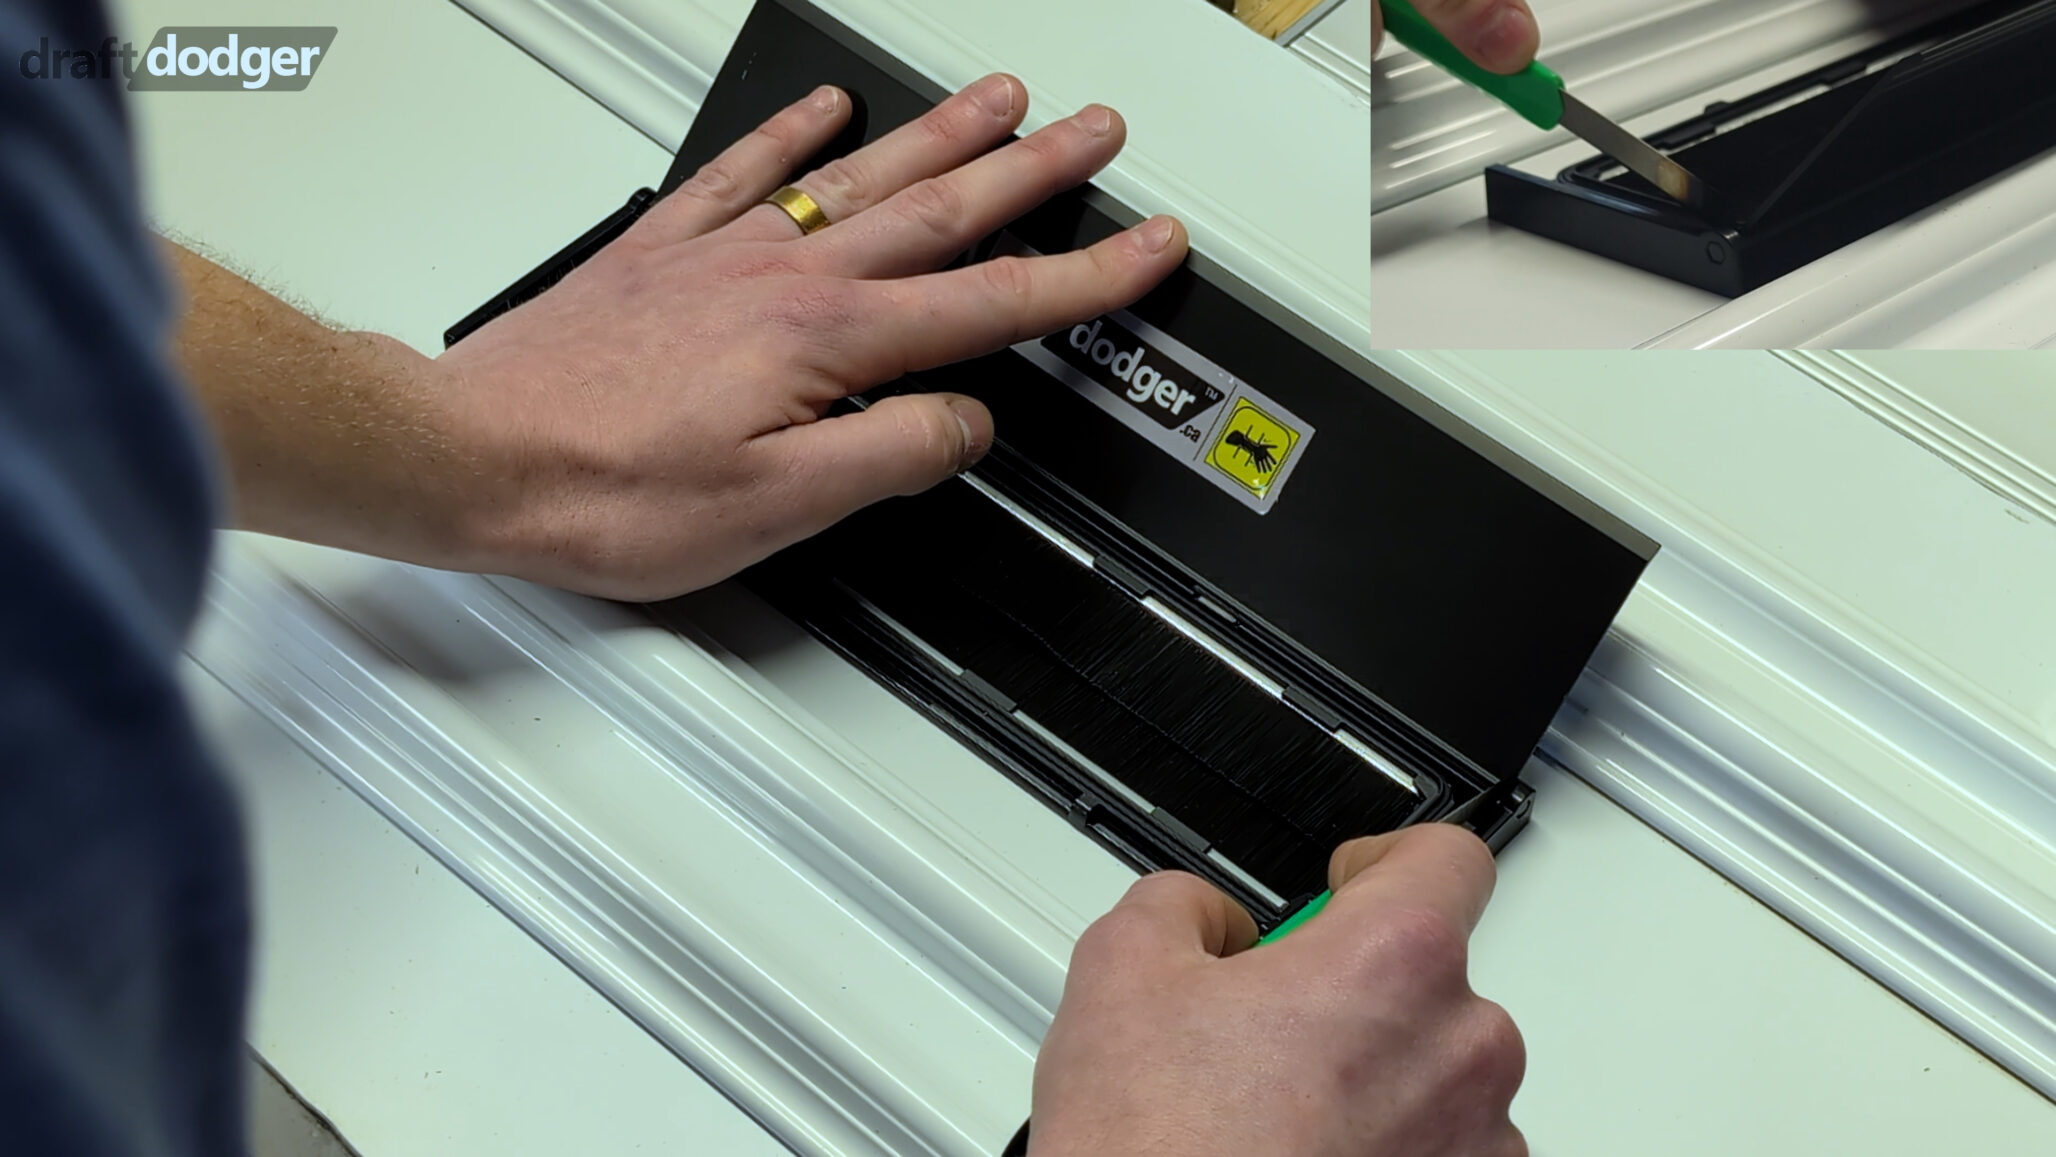
- Open the flap to see where the torsion rod is located and how deep the blade needs to go. Widen the gap by pushing the flap to the opposite side.
- Heat the utility knife with the lighter and insert it in-between the flap and slot where the torsion rod lies with the cutting edge towards the rod.
- Carefully rock the blade back and forth slowly so that only the torsion rod is being cut. Take your time and when it is about to be cut, go slower so that the mail slot does not get nicked by the blade.
- Repeat for the other side.
Installing the torsion rods
There are two methods that can be used to install/adjust the torsion rods: using a flathead screwdriver or pliers.
NOTE: When installing the torsion rods, you want to avoid having the torsion rod snap into the grove without having your desired torsion set correctly.
Calibrating the strength of the torsion rods
When installing the torsion rods, you will have to determine the strength of the torsion rod and consequently the strength of the tension holding the flap closed.
It is recommended that the rod of the exterior side is rotated TWO notches while the interior rod should only be ONE notch. This creates strong tension on the exterior flap to ensure a tight seal and mail get passed through properly, and the lighter tension on the interior flap will let the mail enter your home with ease.
Flathead screwdriver method
This method is used for installing torsion rods with the notch in the hexagonal head. Older models may not have this, please proceed to the plier method.
Tools needed: flathead screwdriver
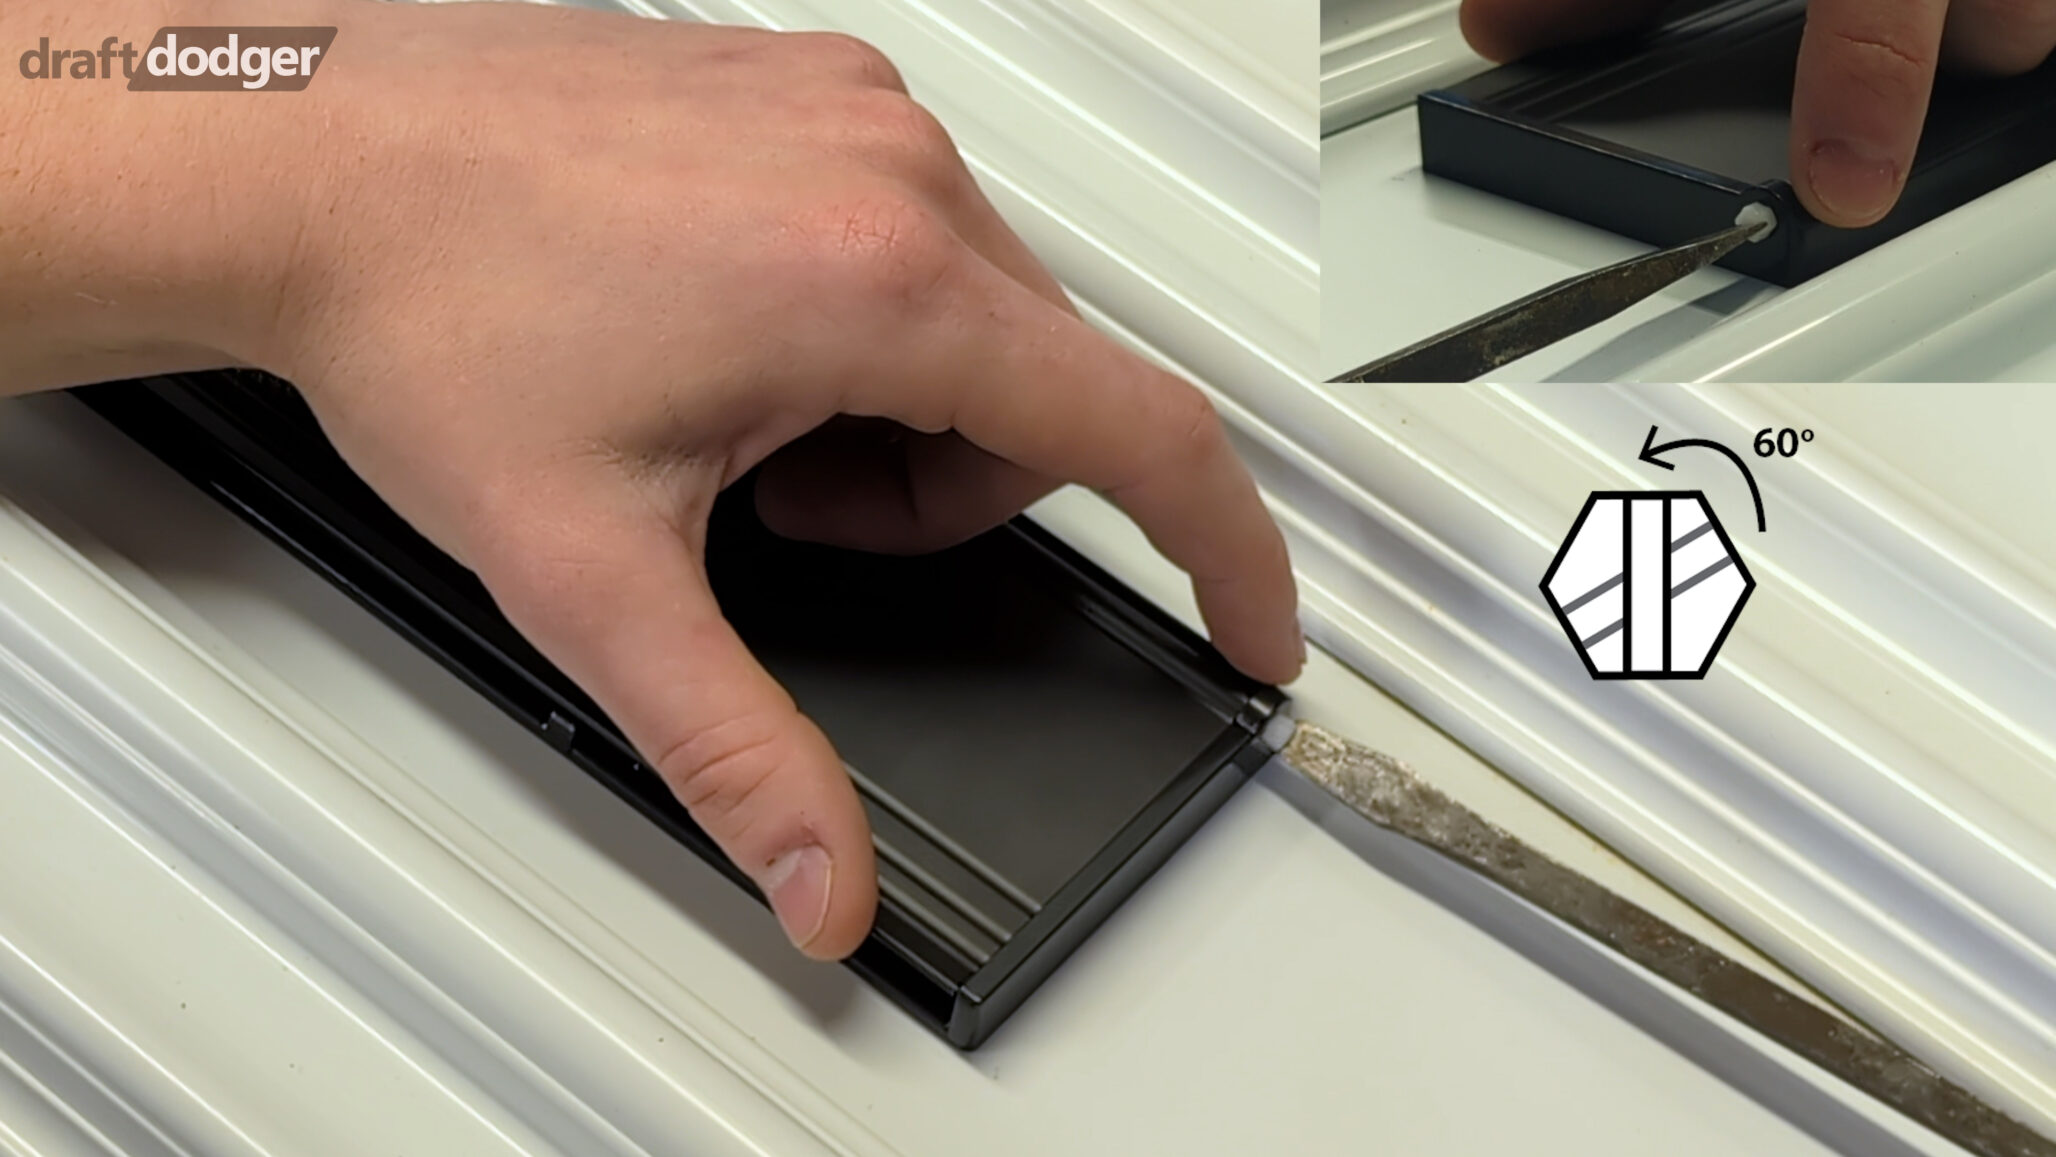
- Place the flap in the closed position.
- Slide the torsion rod through the slot and flap so that the mail flap is supported by them – do not insert the hexagonal head.
- Insert the flathead screwdriver into the notch on the hexagonal head.
- Depending on your preferred tension strength, rotate the hexagonal head 60 or 120 degrees – do not insert the hexagonal head yet. Make sure that you are rotating it in the correct direction so that the tension force is closing the flap and not opening it – you can test this by rotating the torsion rod in opposite directions.
- Test the tension of the flap by carefully opening it – if it is to your liking, then proceed to the next step; otherwise, adjust the torsion rod as needed.
- Once you are satisfied with the tension on the flap, push the hexagonal head into its slot until you hear an audible “click”. The key end of the torsion rod should be fitted into the grove on the flap.
- Repeat on the other side.
Plier method
Tools needed: flathead pliers
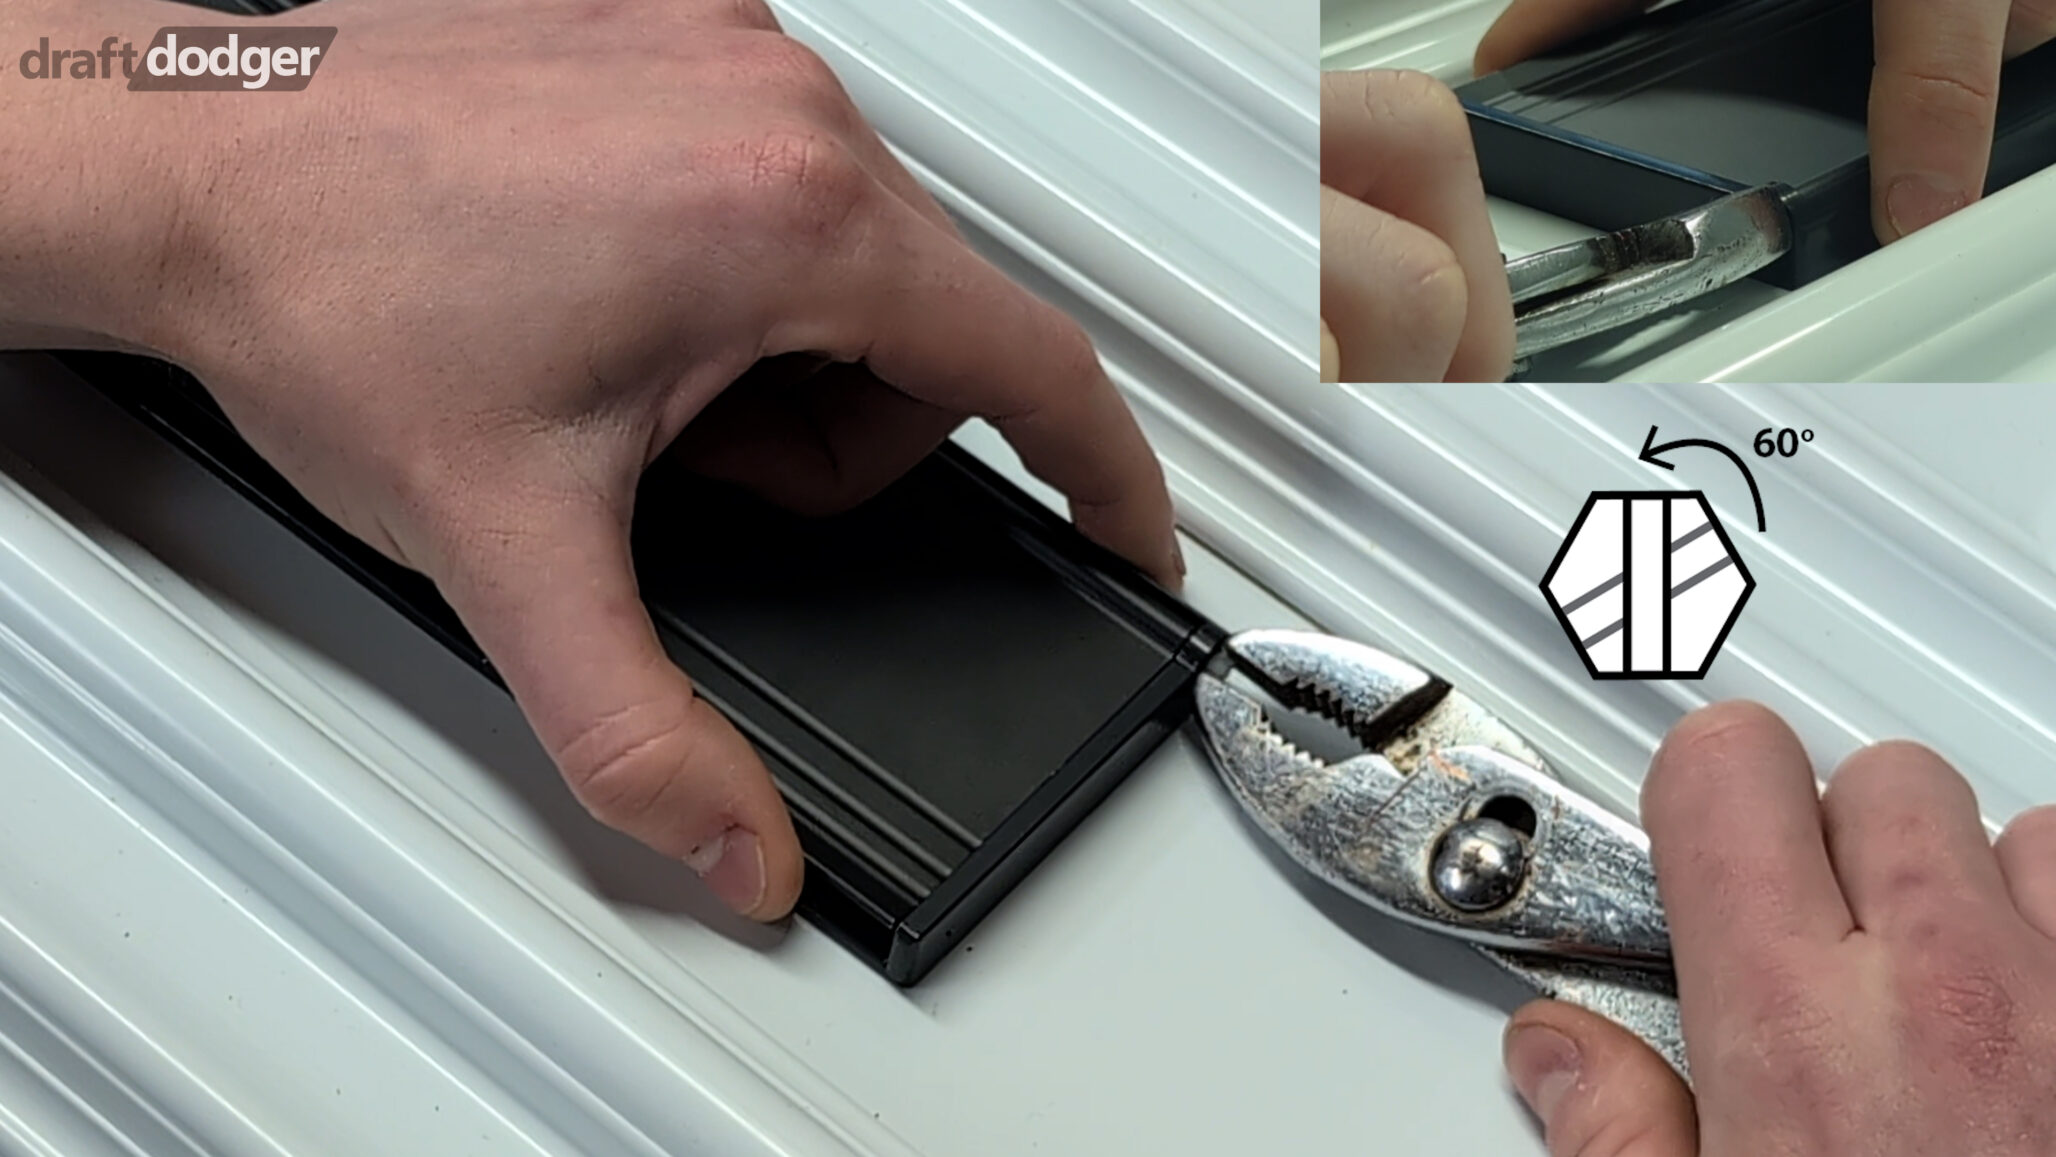
- Place the flap in the closed position.
- Slide the torsion rod through the slot and flap so that the mail flap is supported by them – do not insert the hexagonal head.
- With a firm grip, grab only the top half of the hexagonal head. Note: The torsion rods are slippery, and it is hard to hold such a small surface while keeping the downward pressure.
- Depending on your preferred tension strength, rotate the hexagonal head 60 or 120 degrees – do not insert the hexagonal head yet. Make sure that you are rotating it in the correct direction so that the tension force is closing the flap and not opening it – you can test this by rotating the torsion rod in opposite directions.
- Test the tension of the flap by carefully opening it – if it is to your liking, then proceed to the next step; otherwise, adjust the torsion rod as needed.
- Once you are satisfied with the tension on the flap, push the hexagonal head into its slot until you hear an audible “click”. The key end of the torsion rod should be fitted into the grove on the flap.
- Repeat on the other side.
If there is still uncertainty after viewing this guide, please refer to the contact page and send us an e-mail.